Pick and Hold Module: User Software
Download the software for your Pick and Hold units
REQUIREMENTS
A PHu-50 module is required, with USB-Micro cable, and PC with programming Software PHprogrammer.exe V6.0+. Other than these items a load device is required, and Power Supply able to supply voltage and current appropriate to the application, and within the limitations of the PHu module being used.
SOFTWARE INSTALLATION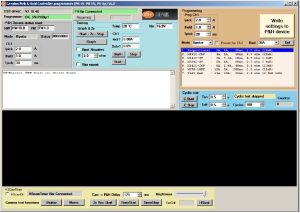 Click on the link to open the .ZIP file:
Updated PHu Installation Software
The folder containing the software should be copied to the PC being used for programming. It is recommended that the complete folder is copied as it is important that all the programmes are in the same folder on your PC.
The Setup program “.exe” should be run to install the USB drivers required to use the PHu-50 module. The latest driver is downloadable from https://ftdichip.com/drivers/
Double clicking the ‘PHprogrammer’ icon will start the programming software.
Analytical Pick and Hold Installation Notes
1. Connect ANA circuit via USB to laptop.
2. Create Folder on C drive and copy files from USB.
3. Run CDM212364_Setup.exe file. (Requires Admin Account)
4. Once installation wizard is complete start Phprogrammer.exe
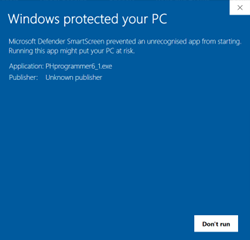
5. In certain circumstances Windows Defender might block Phprogrammer.exe follow the step below to unblock the program.
Close the window pop up shown here:
Right Click on Phprogrammer.exe and select properties
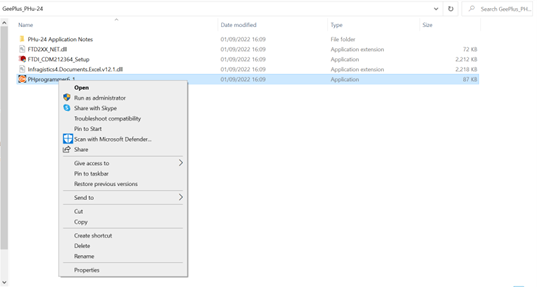
Tick Unblock and Apply followed by Ok to close Properties Window

Run Phprogrammer.exe
6. Depending whether or not you have the P&H circuit connected to your pc when you start the software, you will see one of the following:
Circuit connected

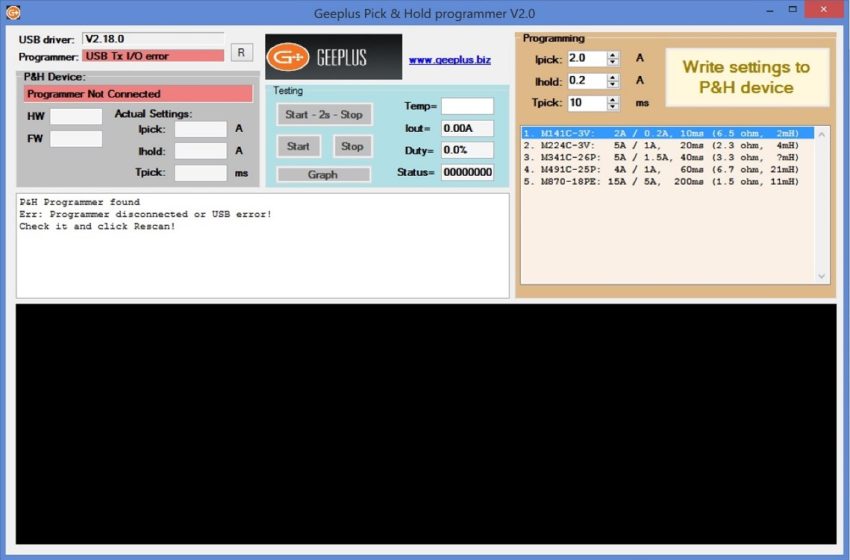
Circuit not connected:
Either way is Ok but when connecting the circuit to the pc via USB after you have started the software, you will need to press the Reconnect button on the P&H programmer as shown below before the software will register the connection:
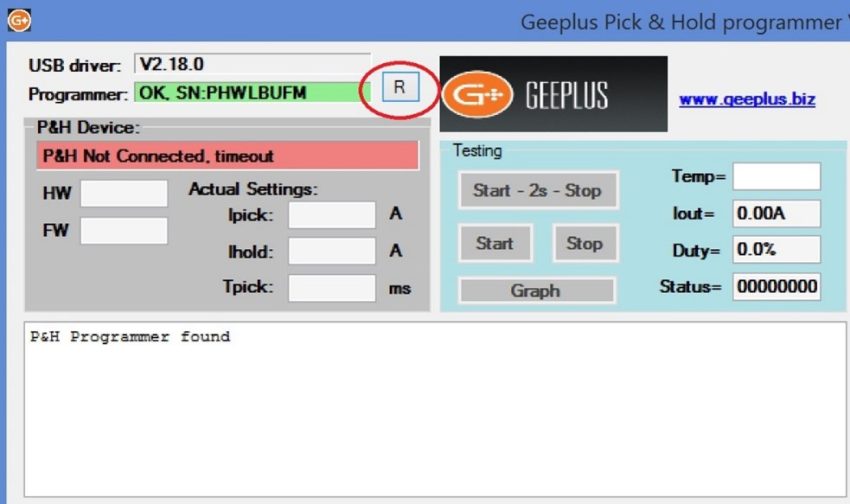
The P&H device display box will still be switching from the following two messages which is ok.

7. Next you need to connect Power to the circuit via the power terminals 3-4 on the Wago connector. (WARNING! >27v will damage module.)

This will then give you the following screen:
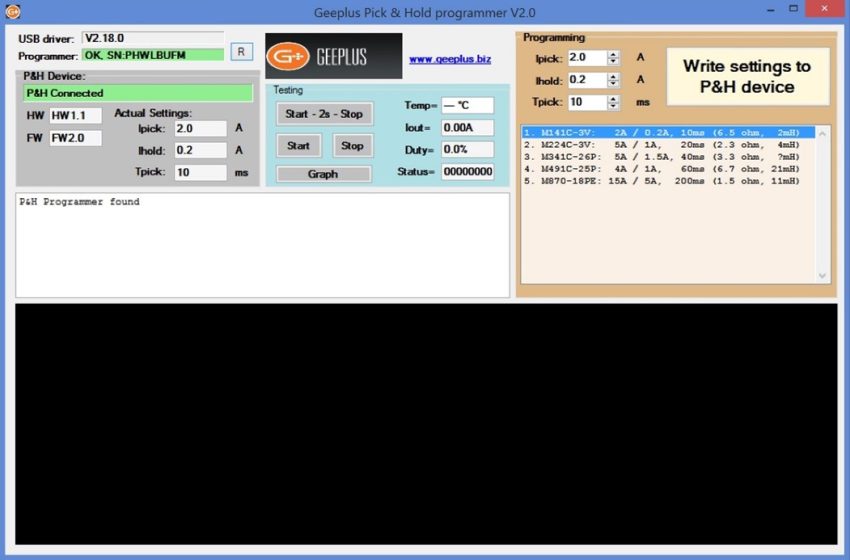
From here you are ready to start using the device.
![]()
+44(0)208 6567788
Geeplus Europe
Worldwide Customer Service
+1 803 549 6422
Geeplus Inc.
South Carolina (USA)
+81 45 662 9705
Geeplus Asia
Yokohama, Japan
Contact Geeplus
We're here to help - Contact Geeplus today!
Follow us on Social Media
Next Generation Motion Control Solutions!
Geeplus Headquarters:
Triple Two Centre, Tannery Close Beckenham, BR3 4BY, UK
©Geeplus Holdings 2019, All Rights Reserved
Privacy Policy
![]() Offices in Europe | USA | Asia
Offices in Europe | USA | Asia